| INTRODUCTION
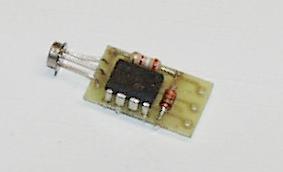
Heathkit used the National LM3911 temperature sensor in their ID-1490, ID-4001, ID-5001 and probably a few other models that monitored indoor and/or outdoor temperature. The Heathkit part number of the module was typically a 100-1727 or a 100-1728. The LM3911 was a single chip that would output a 10 mV change for every degree of change in temperature. Unfortunately the LM3911 is no longer available and even small quantities have disappeared from surplus dealer's and distributor's shelves. The LM3911 can however be duplicated using a currently available National LM335 temperature sensor, LM741, 6.8 Volt zener diode, and one resistor. The circuit was taken directly from the National LM3911 datasheet. This kit provides the necessary components, including the new aluminum tube, to build a replacement temperature sensor that can be directly substituted for the original temperature sensors that were used on the above kits. All of the components have already been mounted on the board and the board has been tested. All that remains is to attach the new board to the old cable, and seal the completed assembly with silicon seal. |
Assembled and Tested
Temperature Sensor $ 25.00 Plus $ 5.00 Priority Mail Shipping California Residents please add 8.75% Sales Tax |
| INSTALLATION
To begin the assembly it will be necessary to remove the old sensor by cutting the existing cable approximately 6 inches from the existing sensor. The remaining 6 inches can be used to re-attach the old probe, should you feel it necessary for trouble shooting or whatever reason. |
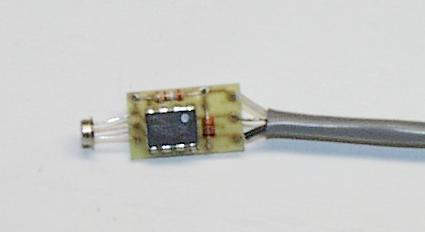
Temp Sensor board attached to old cable end |
| FINAL ASSEMBLY
Now that the probe is electrically attached
to the cable, it is necessary to mechanically secure the probe and wire into
the sensor housing. Make certain that there is a good attachment of
the silicon seal to the existing cable. This should create a water-tight
seal. Stand the probe on end and allow all of the silicon seal to
cure completely. This will take a couple of hours. Letting it
stand overnight is best. |
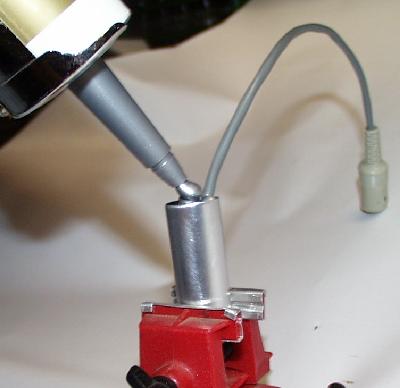
Sealing the assembled temperature sensor in the tube |
| READY TO USE
Your temperature sensor is now ready to be calibrated and put into use. Follow the calibration instructions for your particular kit. This typically includes submitting the probe to a hot water bath of a known temperature and an ice/water bath that should be fixed at 32 degrees Fahrenheit. If you no longer have the original manual, we have replacement manuals available for some kits at: |
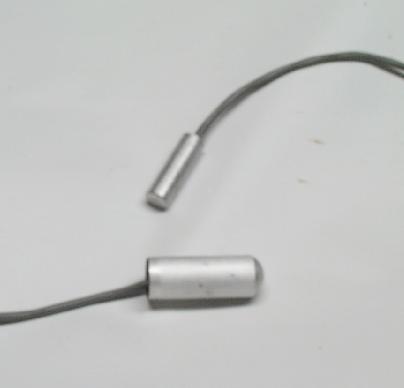
Original Heathkit sensor (top) and new replacement unit (below) |
| CONTACT US AT:
Data Professionals Sales@D8aPro.com
PayPal ID: Don@D8aPro.com
|